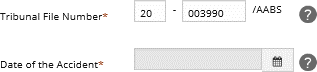
This guide is to assist you with submitting digital documents directly into your Automobile Accident Benefits Service file via e-File. To log into e-File, use the LAT-AABS file number as your username (example: 20-003990) and the date of accident/loss as the password. When uploading documents, please select the correct corresponding Document Type shell from the drop-down menu.
Before uploading your digital documents, please ensure you adhere to the following:
Please note from the below that [AR or RR] stands for Applicant Rep. or Respondent Rep. Example: Case Conference Summary from Applicant Rep. = CCS AR.PDF (see below chart)
| AABS Forms: | Naming Convention for Upload: |
|---|---|
| Case Conference Summary | CCS [AR or RR] |
| Representing Minors and Mentally Incapable Persons | Guardian Rep Minors or MI |
| Certificate of Service | CoS [Document Name] [AR or RR] |
| Declaration of Representative | DoR [AR or RR] |
| Notice of Motion | NoM [AR or RR] |
| Summons to Witness | Summons Req [AR or RR] |
| Notice of Withdrawal | NoW or Withdrawal |
| Request for an Adjournment | Adj Req [AR or RR] |
| Acknowledgement of Expert's Duty | Ack Expert Duty [AR or RR] |
| Other Documents (not ABBS forms): | Naming Convention for Upload: |
|---|---|
| Submissions | Submission [AR or RR] |
| Responding Submissions (Written Hearing) | Reply Subs [AR or RR] |
| Denial Letters (no AABS form) | Denial Letter |
| Expert Report | Expert Report [AR or RR] |
| Medical Report | Medical Report [AR or RR] |
| Response to Notice of Motion (no AABS form) | NoM Response [AR or RR] |
| Treatment and Assessment Plan | Treat and Assess Plan |
| Schedule/Appendix | Schedule/Appendix [sub sections] |
| Other | Use descriptive file name |
3 options are available to e-File with LAT-AABS:
To “Start a new AABS Application” or “Respond to an existing AABS Application”, click the corresponding button and follow the instructions.
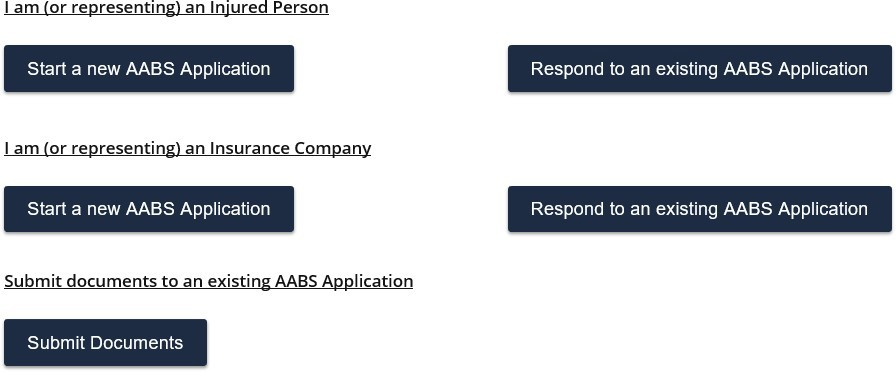
Send a completed Certificate of Service to AABS
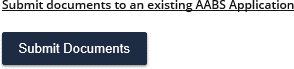
The following instructions will outline the steps to uploaded digital documents. To begin your e-File session, select the “Submit Documents” button:
To log into e-File, you will need:
Fill in “Party Identification” (*mandatory fields).
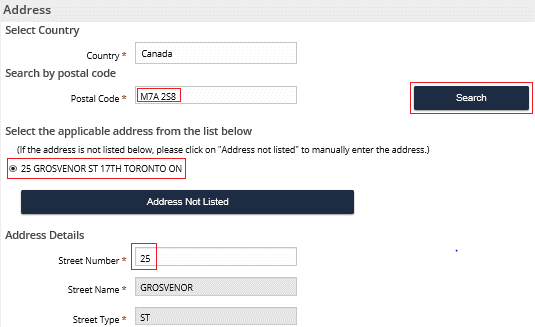
Note: To update the “Mailing Address” field you will need to select the “Add/Edit” button and perform a Canada Post postal code search and confirmation.

Enter your postal code or your law firm's and click “Search”, then select the correct address from the search results.
Enter the address number into the “Street Number” field (the remaining “Address Details” fields will prepopulate from your search result selection). Click “Continue”.
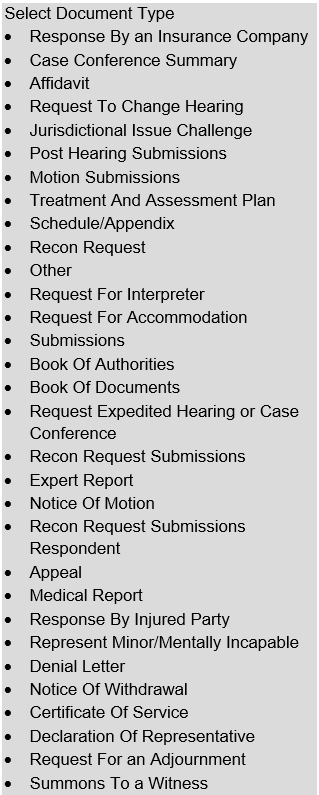
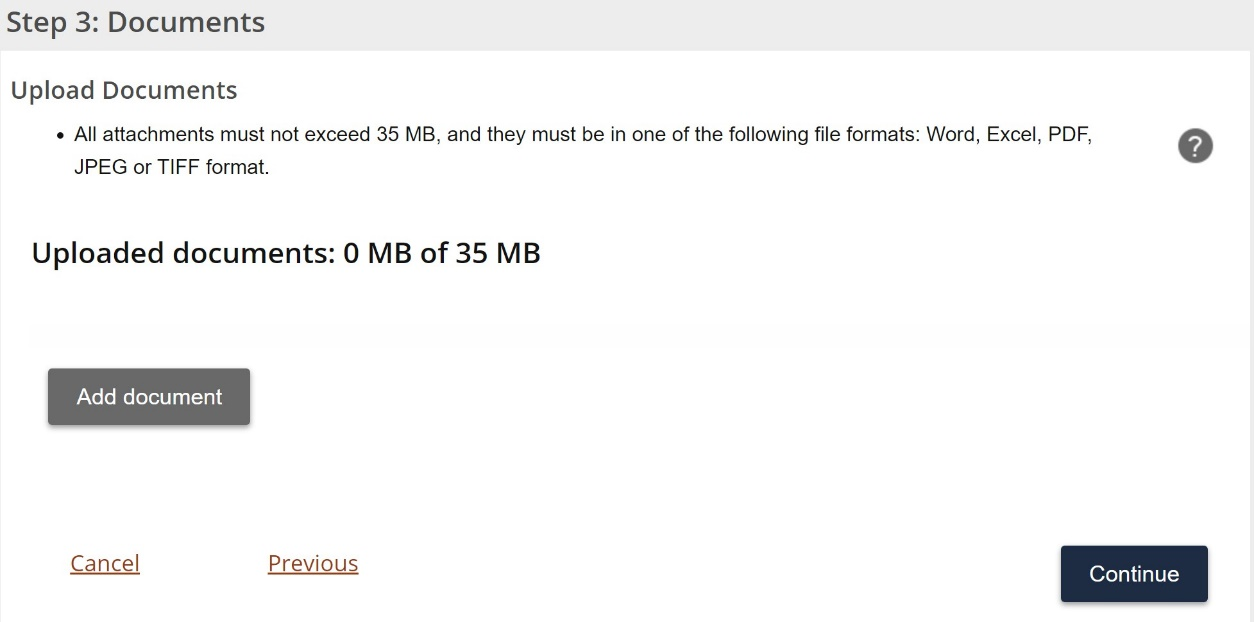
Click the “Add Document” button and choose the document type from the drop down “Select Document Type” menu. When uploading documents, please select the correct corresponding Document Type shell from the drop-down menu.
Click the “Browse” button and select the document to be uploaded to the file. To upload additional documents, click the “Add document” button and follow the same steps outlined above.
Selecting the correct Document Type from the drop down is important because the documents you upload will be listed under the document type you selected in our case management system and will assist the Member when reviewing your file. Please ensure you use the established naming convention for the files you upload.
As you add documents, the combined file size total will be displayed up to a total of 35 MB.
Once you have finished uploading your documents, click the “Continue” button. Confirm and complete the mandatory fields and certify that within 5 days, you will serve a copy of the e-Filed documents to all other parties and will serve the Tribunal with a completed Certificate of Service as proof of service of the documents.
Blank ’Certificate of Service’ forms are available on the Tribunal’s website at: https://tribunalsontario.ca/lat/automobile-accident-benefits-service/forms/
After clicking the “Submit” button your documents will be submitted directly into your file. Once submitted, you can download and save a PDF of the “Document Submission – Confirmation” form called “eFile_Sub_Receipt”. This document will list the details of the person that performed the e-File document submission session and the details of what files were uploaded to the file.
If you have any questions or require support, please contact the Tribunal for assistance at LATRegistrar@ontario.ca.